Showing posts with label Recipes. Show all posts

Tuesday, January 30, 2018

A Sick Day and Petit Fours


My poor little guy got sent home from school Thursday afternoon, because as his excellent teacher observed, "He's just not himself and he's not getting anything done, I think he doesn't feel well." Weeell, she was right, and later that afternoon (after coming home) Hen started throwing up. He'd caught that stomach bug going around his campus.

Thankfully his nausea didn't last long and we were going into a weekend, so his lethargy and recovery could take their own course. At our house, that meant lots of warm baths with Epsom salts and lavender, pjs all day long, and 'Cake Wars' nonstop for almost 3 days in a row.

What that meant for me was by Saturday afternoon (and about the 90th episode of 'Cake Wars'), Mama wanted cake. Like, now.

To be honest, I've never been that successful at making "regular" cakes from scratch- they always turn out dry no matter what the recipe. However I picked up a few little hints as to what I might have been doing wrong in the past from all those cake baking shows, and I gave it another go. Just in case I got it wrong again, though, I set myself up in advance for a recovery strategy- I was going to make petit fours.


I'm happy to say my cake did not turn out dry, and the petit fours were really fun and tasty! So here is my first successfully moist "regular" cake recipe, with all the extra stuff I did to make them fancy:

Vanilla-Almond Petit Fours with Prickly Pear Jelly Filling
and Almond Glaze
Adapted from the Swan's Down recipe for 1-2-3-4 Pound Cake
(Makes at least 2 dozen petit fours or more, depending on how you cut them)

For the cake:
2 sticks salted butter, at room temp
2 cups (scant) plain ol' sugar
4 large eggs
1 cup whole milk
2 tsp vanilla extract
1/2 tsp almond extract
3 cups cake flour, sifted together with
3 tsp baking powder
1/2 tsp salt

For the glaze:
1 1/2 TBS light corn syrup
1 tsp almond extract
~4 cups powdered sugar
boiling water

For the prickly pear jelly:
prickly pear juice
lemon juice
sugar
Pomona's Universal Pectin
(I think strawberry preserves, raspberry preserves, or lemon curd would have been good, too, but prickly pear jelly is what we had on hand, and we weren't getting out that day!)

Preaheat oven to 350F and spray a sheet pan with nonstick spray, then line with parchment paper. Cream butter and sugar, then add eggs one at a time and beat until mixture is very light and fluffy (the more air the better). Add extracts. While mixer is on lowest setting, slowly add 1/3 flour mixture, followed by 1/3 of the milk, and alternate the two until all is incorporated. Do not over mix! Spread batter onto parchment-lined sheet pan and bake on middle rack for ~20 minutes or until toothpick inserted into center comes out clean. Cool completely before moving on to next step!

Once cake is cool, trim any rounded or sloped edges so you have a very sharp rectangle (this will be impossible if you try while the cake is still warm). Cut resulting rectangle in half, and spread one half with prickly pear (or other flavor) jelly/jam (I made the prickly pear jelly by first making prickly pear juice, then following Pomona's directions for reduced-sugar jelly). Place other half of cake on top and make sure edges are straight and square (trim more if needed), then place in freezer for ~20-30 mins or until pretty darn firm. 

While cake is in freezer, get the royal icing ready by putting powdered sugar, corn syrup, and extract in a mixer on lowest setting (with wire whisk attachment), and slowly trickle in boiling water until a fairly thin glaze is achieved (the amount of water needed will be different for everyone; you basically just need to make sure the glaze is thin enough to pour over petit fours without having to be spread, but not so runny that it immediately soaks into the cake).  

Once cake is firm, remove from freezer and with a serrated knife carefully cut into desired shapes. I cut mine into a grid of squares, then cut about half the squares diagonally across to make triangles and kept the others as squares for the fun of it. I don't think there's a wrong shape, you just want to make sure the shape/size you make only requires a few bites per piece. 

To finish, roll out a few sheets of waxed paper and using a fork and a spoon, glaze the petit fours: place petit four on the ends of the tines of the fork, hold it over the bowl of glaze, and spoon the glaze over the cake. Make sure each side is completely covered with glaze all the way down to the bottom, allow excess to drip away as best you can, then transfer to waxed paper and slide off the fork using the back edge of a butter knife. Don't worry if you drop a few into the glaze, just pick them out and let them drip and keep going!

I put some colored sugar on top of mine for fun, but you could top these with anything you like (designs in thicker colored icing, sprinkles, fresh fruit...) or leave them completely plain. 

Allow the glaze to dry before attempting to eat one or even cover with plastic wrap! 


These fancy little cakes are being picked off pretty quickly, and I'm proud to say everyone so far has given them the thumbs-up. I think, if I had presented these to the baking contest judges, I would have made it to the next round............... or at least that's what Henry said. I'll definitely be trying this recipe again!

Wednesday, October 25, 2017

Fall 'Maters


The fall tomatoes are coming in, y'all! I've never had this good of a tomato year, ever. There's always too harsh of a drought over the summer or too early of a freeze in the beginning of the fall... but not this year! I can't believe it, but I'm not about to look a gift horse in the mouth...


...and so with gratitude I processed a second generation of tomatoes this morning, and actually got to put up some jars of homemade salsa that I'd given up hope of having this year!


Our first yellow "Lemon Boy" tomato salsa, with homegrown tomatoes, peppers, and herbs. I know I'm gushing but I still can't believe it. And if the weather holds, there might be even more coming in soon, because there are just so many green ones still out there (although we did break the 30-something-degree seal last night, so this high could be short lived).

In the off-chance I am making this again soon, I'm making a note today of the recipe that seemed to work the best so far:

Fresh Tomato Salsa
made 4 1/2 pints

3lbs fresh tomatoes, seeded and chopped (weight after seeding)
1 large onion
3 banana peppers (or 2 jalapenos)
 1 cup distilled white vinegar
1 TBS salt
1/4 cup (scant) sugar
1 tsp garlic powder
1 tsp cumin
pinch of oregano
chopped cilantro (optional)

Dissolve sugar and salt into vinegar in non-reactive pot over low heat. Add chopped tomatoes, onions, and peppers along with spices and bring to simmer. Simmer about 5 minutes. Turn off heat, add cilantro (if using), ladle into hot, sterilized jars, wipe rims, secure lids, and process via boiling water method for 15 minutes.


Aaaaaaand then, try not to eat it all immediately.

Thanks, fall 'maters!

Tuesday, July 25, 2017

Little Campers :: Cooking Lesson

Today we all gathered 'round the ol' kitchen island for another fun Little Campers activity- cooking! We decided not to do anything too complex due to the age (and coordination) ranges of our group, but instead went with a timeless standby: granola. We based our activity off this recipe from LuSa Organics' blog, which I've had success with before, and this recipe from Once Upon a Chef, which Keri has tried and tested. Each recipe was loosely followed with a few tweaks here and there to fit our tastes and the supplies we had on hand.


Everyone got a chewy granola bar to taste, their own jar of crunchy granola to add dried fruit to depending on their preferences, and for the conclusion of the session they were all awarded adorable hamburger enamel pins Keri found at the Target dollar spot.


And everyone went nom, nom, nom, all the way home...

Last time: Movie Making Project

Next up: Photography!

Friday, April 21, 2017

Spring Onion Soup


This week I've been out in my garden, assessing and revamping. I have a tentative appointment with our neighbors to go scoop and haul horse manure this weekend, and I'm trying to make room for as much of it as possible in my defunct garden beds.

Yesterday, I came to terms with the fact that my spring onions weren't going anywhere, and that their space should be one of the areas amended... so I pulled them all. To my surprise, half of them were rotting from the outside layers inward, and I discovered a new kind of slime mold (lucky me) while I was out there. I think I should stop calling it a 'garden' and start calling it a petri dish!

Anyho, I wasn't about to let these little baby onions go to waste, rotten layers or no, so I cleaned them up, peeled back all the mushiness, and came up with a plan...  

Spring Onion Soup
Makes about four appetizer-sized portions

1 lb spring onions, cleaned
1 quart good chicken stock or broth
4 TBS butter mashed with 2 TBS flour to form a paste
1 bay leaf
1/2 cup heavy cream

Place spring onions in pot and cover with stock or broth. Add bay leaf and simmer, uncovered, until onions are very soft and stock is reduced by half. Remove bay leaf and puree (be super careful, this hot stuff splatters and stuff!). Put puree back into pot and whisk in butter/flour paste. Turn heat back on to low and continue to whisk until soup thickens. Turn off heat again and slowly add in heavy cream. Whisk until incorporated, season with salt and pepper to taste, and serve right away! 
(If you want a thicker soup, make more butter/flour paste a tablespoon at a time and whisk in while heat is on until it's as thick as you like.)


I garnished with crispy fried onions, and that crunch was a nice texture in the creamy soup. However, I over-seasoned and my soup ended up being too salty (sad day), so go easy on the salt- because of the thickness of the soup, the salt dissolves more slowly (vs a brothy soup), thus it will grow saltier over time (d'oh). 

So the moral of this story? Learn from my mistakes: don't take shortcuts in building garden soil, and go easy on the salt!

Enjoy!

Friday, February 10, 2017

Super-Dee-Dooper Dark Chocolate Cookies


Soft, dense and fluffy at the same time, with just the right amount of gooey... a crowd pleaser every time. Good fresh or a few days later, and especially good with a scoop of ice cream 
sandwiched in the middle!

Super-Dee-Dooper Dark Chocolate Cookies
Makes 12-15, depending on how big you make 'em

1 1/4 cup all-purpose flour
1/3 cup natural unsweetened cocoa powder
1/2 tsp baking soda
1 1/2 sticks butter at room temp
3/4 cup evaporated cane juice 
(or sub 2/3 cup packed brown sugar and 1/4 cup white sugar)
1 egg at room temp
1 tsp vanilla
1/4 tsp instant espresso powder, ground superfine
1/2 tsp salt
1/2 cup dark chocolate chips

Preheat oven to 350F and line cookie sheets with parchment paper (don't skip the parchment, these cookies bake up super soft and you would destroy them trying to spatula them off a bare cookie sheet). Sift dry ingredients together and set aside. 
Beat butter with sugar(s) until fluffy and add egg and vanilla. Beat again until fluffy. Add dry ingredients to butter fluff and beat until very stiff dough forms. Add chocolate chips and mix to combine. 
Drop by heaping tablespoonfuls onto cookie sheets, allowing room between cookies for them to spread out in the oven. Bake for about 10 minutes or until surface of cookies no longer look super shiny (they will not firm up much or brown). Remove from oven and slip the parchment paper- cookies and all- off the cookie sheets and on to the counter top. Allow to cool for about 10 minutes or until they're firm enough to pick up. 

Pick up.

Devour.

Repeat.

Friday, September 2, 2016

Glazed Lemon Ginger Scones


The week before school started, I made a double batch of something breakfasty (zucchini bread, banana muffins, oatmeal pancakes, plain waffles for the toaster...) almost every morning. My plan was to put it all up in the freezer to try and ease the stress of the I'm-not-in-a-school-routine-yet frantic mornings to come.

Welp, we're nearing the end of the second week of school, and my kids swear they're tired of it all.

Already.

Well, great.

Pick your battles, or so they say... force my kids to eat another banana muffin (and add ten or fifteen more minutes to the morning before they get out the door due to the fight over eating something they don't want), or make something quick and easy to finish out the week and give their palates a break?

This time, I went with the latter.


Glazed Lemon Ginger Scones
Makes about 2-dozen small scones

2 cups unbleached all-purpose flour (or whole wheat pastry flour)
4 tsp baking powder
3/4 tsp salt
1/3 cup granulated sugar (we use evaporated cane juice, but coconut sugar 
or some other dry granulated sugar will work too)
 4 TBS good butter
2 TBS coconut oil
3/4 cup full-fat coconut milk
1 egg
zest from 1 lemon
1/2 tsp powdered ginger (or 1 tsp grated fresh ginger)
1 tsp vanilla

For the glaze:
1/2 cup powdered sugar
enough water to make a silky not-too-runny, not-too-thick goo; start with about 1 TBS

Preheat oven to 375F. Cover a baking sheet in parchment paper. Combine flour, baking powder, salt and sugar in a bowl, then cut in the butter and coconut oil. Make a well in the center of this now-crumbly mixture and add coconut milk, egg, vanilla, zest and ginger. With a fork whisk the wet into the dry until just combined (don't over-mix or knead this dough!).

Turn dough out onto parchment-covered baking sheet and pat into a roughly-square shape about 1/2 inch thick with the palms of your hands. Using a rolling pizza cutter, cut into squares, then cut diagonally across the squares to make triangles (you can see from my pic above that it's not a precise cutting procedure, and you don't even have to do triangles if you don't want to!). 

Bake on middle rack for about 15 minutes or until corners and edges begin to turn brown. 

Allow to cool completely before glazing, if you choose to glaze them.


Enjoy!

Thursday, October 29, 2015

Making Chicken Treats

Oh, um, "chicken treats" as in treats for the chickens, not treats made from the chickens.

*ahem*

Moving on.

Yesterday I finally dove in to rendering the big box full of beef fat we got along with our forequarter. I was actually kinda disappointed in the quality of it- the last time I got beef fat from this particular butcher, they gave me the leaf fat. This year I got odd scraps and bits of back fat, and it not only complicated the prepping process, it rendered only two and a half quarts of tallow from the whole shebang.

There was a lot of waste from having to trim every piece. There was a much stronger smell (despite all my crock pots being outside). And after it was all said and done, there were even more leftover bits that needed to be dealt with.

Since the beginning of the packing and processing of our beef, our dog has gotten about as many bones and scraps as I think she can handle. Seriously, we didn't even need to decorate for Halloween this year because after running out of places to bury all the spent soup bones, she just started leaving them lying around. It's looking a little creepy.

So what to do with the blubbery back fat leftovers from this tallow project? Eureka. Make "suet" treats to fuel the girls' little furnaces when the real cold temps are upon us!

What we did:

In a giant bowl, we mixed about 5 cups of wild bird seed with the tallow leftovers, then added about 1/2 cup blackstrap molasses, about 3 cups coarsely-ground corn meal, and about a cup of wheat germ. We mixed it all together, let it cool, then filled up two gallon-size freezer bags, pressed 'em flat, and stuck 'em in the freezer for chilly days and colder nights.


We saved out about two cups of the mixture to let the chickies have a "taste test," and they gobbled it up so fast I didn't even get a pic of them eating it. I guess that means this recipe gets five stars, right?

I'm feeling good about using up all the scraps and- at least this far- not wasting any part of the beef we have. I'll feel even better about the trouble, mess, and smell that this little project added to the process when I pull a chunk of this stuff out of the freezer and offer it to my girls to warm them and thank them for the eggs they give us in return.


Wednesday, October 21, 2015

There is Plenty.

As I've lamented before, I'm missing my fall garden right now. If this was a 'normal' fall, I'd be dehydrating greens to make super green veggie powder, I'd be pickling another round of beets, I'd be cutting and hanging herbs, and maybe I'd be planning a batch of sauerkraut made from my first-ever homegrown cabbages.

Buuuuuuuuuuuuut I'm not. However, fall is still a time of harvest, even if there's no garden for the harvest to come from around here.


With all the apple pie we've been eating, we have been able to make a good stash of apple scrap jelly. Some day those apple peels will come from our own orchard... but until then we'll make it from the peels of farmers' market apples.


We've also recently picked up our semi-annual forequarter of grass-fed beef, and as part of a different kind of harvest I've been putting up quarts of beef bone broth. Next week the temps are supposed to be nice and cool, and if the weather does what it's supposed to do I'll be out on the back porch with crock pots, rendering tallow.

I've also got two quarts of "limecello" aging in a dark corner of the laundry room (thanks to the need to do something with 32 limes I had on hand, long story...), and making booze to fill the freezer always soothes my angst over not having garden produce to put up right now.

There is plenty all around me, even if it's not coming out of my soil.

Thursday, September 3, 2015

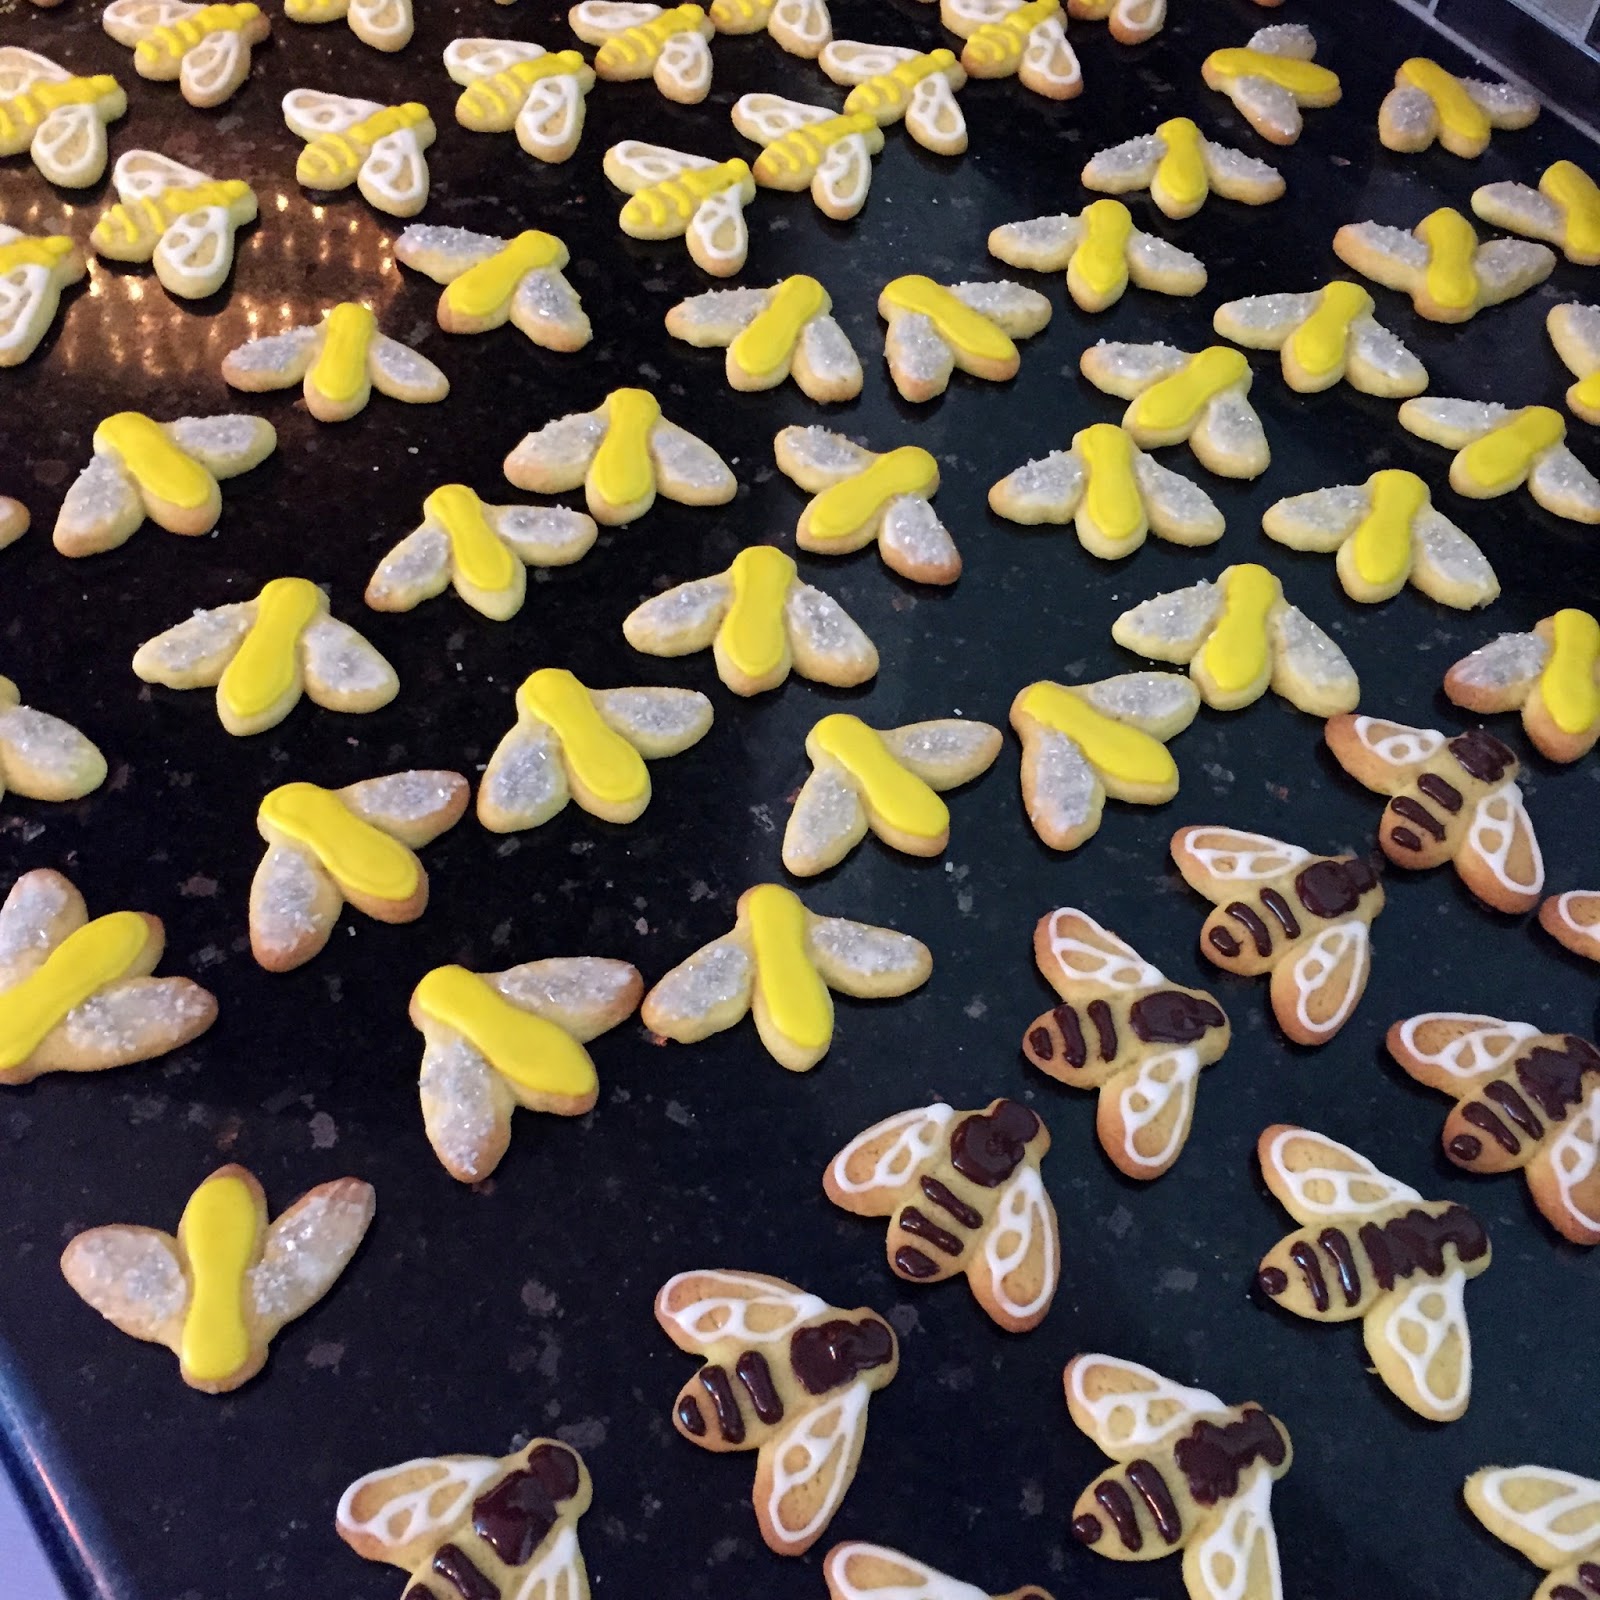
Bees! (Well, Bee Cookies)


I'm falling deeper down the rabbit hole... or would it be bee hole? That doesn't sound right. Anyway, I'm all up in this beekeeping thing. I'm now involved in two beekeepers' clubs, one of which is just getting started, and for last night's meeting I volunteered to bring refreshments for everyone. All 75 of them.

I could have just brought Chex mix and bottled water, but what would have been the fun in that? As the only member in this charter club that does not have bees (yet!), I felt like a little more effort would be well played.

So a little more effort I gave.


Every time I attend a bee class or a beekeepers' meeting, I come away feeling so much more 'in the know' and at the same time so humbled by what I still don't know. One thing I'm feeling good about, though: I feel like I'm ready to place my order for my bees and hives. I can't wait until October!

But until my order is placed and Spring brings my bees, I'll just settle for a hives' worth of bee sugar cookies and a bunch of new beekeeping friends!

Find the cookie cutters I used here. 

Sunday, August 23, 2015

Prepping


The monumental task of purging, organizing, and choosing the clothes that will be worn on the first day of school is now under our belts. New notes have been made for school lunches, fresh batteries are in the alarm clock, and the backpack is packed.


There will be an on-time bath and tuck-in (so help me), and there will be a fresh batch of breakfast cookies waiting in the morning... the morning my biggest Little wakes up a First Grader.

*sniff*

Revamped Breakfast Cookies
Makes about 14 biggins 

1 stick room-temp butter
1/2 cup room-temp lard or coconut oil
1/2 cup sucanat, rapadura, or dark brown sugar
2 cold eggs
1/4 cup real maple syrup
1/2 tsp sea salt
2 tsp real vanilla
1/8 tsp almond extract
1 cup whole what flour (whole wheat pastry flour OK)
1/2 cup almond meal
1/2 cup quick-cooking oatmeal
1 1/2 tsp baking powder
1/2 tsp baking soda
1/2-ish cup dark chocolate chips (optional)
1/2-ish cup unsweetened coconut (optional)

Preheat oven to 350F.

In a stand mixer or handheld mixer beat butter and lard/coconut oil with sugar until very fluffy (this will take around 4 or 5 minutes). Add cold eggs one at a time (mixture will thicken), then add maple syrup, vanilla, almond extract, and salt. On the side combine dry ingredients (leave chocolate chips and coconut out for now, if you're gonna use 'em). With your mixer on LOW slowly add dry ingredients in about three batches, then add the chocolate chips and/or coconut.

Spoon or scoop onto parchment-lined baking sheets and bake for 10-12 minutes or until edges are browned and center seems set. They will spread out significantly, so give them room!

Cool completely and store in the fridge.


Tuesday, November 25, 2014

Making Noms

We're kicking off this week with the prep of a few goodies never tried before- this year, we're bringing ferments to our feast(s)!

The first ruby-red gem we're making is what I'm calling a digestive tonic, though it'll probably turn into "bubbly juice," as Audrey calls it... and that name will probably get more people to try it! Inspired by a few recipes I read for fermented cranberry sauce (which had stuff like pecans and raisins in them, both of which will have family noses turned up), this cranberry drink will pack a nutritional punch and some fizzy bubbles that will be perfect alongside my turkey and dressing!

Cranberry-Orange "Bubbly Juice"
Makes about 1500 mL

1.5 quarts warm-ish un-chlorinated water
1 1/2 cups raw honey
1 lb organic cranberries (fresh or frozen)
zest from 1 orange (organic, since you're consuming the peel!)
1/2 inch grated fresh ginger
1/2 inch grated fresh turmeric
pinch of yeast

In a food processor, blend cranberries (thaw first if using frozen) until coarsely chopped. Pour into container with at least a half-gallon capacity, add zest, ginger, and turmeric, then dissolve honey into warm-ish water and pour over cranberry mixture. Stir in pinch of yeast, cover with a cloth and secure with a rubber band to prevent fruit fly contamination, and let sit on counter top at room temperature for 3-4 days.

Stir 2-3 times daily, and by the second day start smelling and tasting for preferred level of fermentation. Fizzy bubbles should appear by the end of the day and grow more vigorous (you'll hear them when you're stirring). If you let it sit to the point when the fruit sinks and the bubbles stop, congrats, you've made an alcoholic bev! It's still good, but now the kiddos can't have any!

Once the cranberry drink is fizzy and smells a little, well, fermented, strain out the solids and refrigerate that stuff (adjust sweetness to your taste if needed)! Drink within 5-7 days or alcohol content will rise up beyond what you'd want to serve to the whole family. 

Beware: pressure will build in a sealed container, even in the fridge, so store in a carafe or plastic container with screw-top lid so you can gauge pressure with a little squeeze to the sides and release it every once-in-a-while if necessary!

The second little treat we're working on over here is courtesy of our girls, and is also something I haven't tried before: fermented eggs. 

I know! Don't gross out- they're going to be like pickled eggs, only better, and better for you!

I read about them over at Oh Lardy and gave it a go, and they'll be ready for testing by the end of the day today! Love it- uses up eggs? Check! Increases nutrition and health benefits? Check! Quick turnover and near-instant gratification? Check, check!


Depending on their texture, I plan on turning them in to deviled eggs with tasty things on top like bacon and chives. See? I knew in the end they wouldn't sound gross.

Aaaaaaaaaaaaaaaaaaaand just in case we were getting a little too healthy or 'out there,' we've also made these:


We love making noms! 

Wednesday, October 22, 2014

How to Save a Burned Pot Roast

It happens to the best of us, and I'm certainly not one of the best.

You put on a pot roast. You go out to check for eggs. You realize you really need to water the garden. You're outside for over an hour without thinking about it. Oh, and you might also have forgotten to turn the heat down from browning the roast.

Or was it just me?

Anyho, you get back inside and instead of smelling tasty roasty smells, you smell burning. D'oh.

Now the roast and veggies are burned and you only have an hour before dinnertime. Definitely not enough time to start over (like there's even a "spare" roast to be had).

All is not lost, though. Here's what I had:

...and here's what I did:

First, I carefully lifted out all the veggies that were loose (not charred-stuck to the bottom and sides) and set them aside,
and then I worked the meat loose and put it in a new pot. (Do not try to scrape anything loose that is stuck in the char. Do not add liquid to the pot before removing the un-burned and salvageable pieces.)
I then got the charred pot a-soakin' in the sink. 

To the veggies, I added butter and fresh herbs, to offset the bitterness of the burned essence
and the dryness of being overcooked. 
In the fresh pot with the meat I added 2 cups of liquid (unsalted broth, white wine or beer, or water would work) and
about 1/4 cup olive oil. Once it was simmering I also added a couple new bay leaves, some garlic and onion powder,
and some cracked black pepper. I covered the pot and let it cook just below a boil right up until serving time.
This dinner was not wasted because I remembered the #1 rule of salvage: do not scrape the pot once something has burned. It is tempting to rush in and dump a cup of water over the hot, dry, crackling contents of the unwatched pot and start trying to work everything free, but don't! The more you can pick off the top without disturbing the charred bits, the less your final dish will hint at any trouble.

The downside to my story was time- picking apart my foible and starting over left me with a scant 45 minutes to finish the meat, and it ended up a little dry and a little tough. Another hour in the new pot, with the liquid refreshed every once-in-a-while, would have done wonders... but I'll have my chance to make that right tonight when I turn the leftovers into BBQ sandwiches!

See? Everyone has their moments, y'all!

Wednesday, September 3, 2014

An Apple Season Teaser

I scored a huge bag of organic Granny Smith apples for two bucks the other day. They had blemishes on their skins, but were otherwise fine, and spots don't scare me anyhow. I let 'em sit on my counter for a bit while I planned what they would become. The funny thing about apples is there's never "too many," because there's about a thousand million things you can do with them. Granted, a produce bag isn't even close to "too many," but this apple season teaser felt like a bountiful harvest to me!

A while back my mom gave me an apple peeler/parer/corer (kinda like this one), and I knew even while standing in line at the grocery store to pay for the apples that I'd be trying it out.

So today, after picking Audrey up from school, we hauled out the apple peeler, washed up all the apples, and set to work (we're still seeking a decompression period in our new school day rhythm, and what seems to work best is a project of some kind, or so it seems at this point).

Side note: you'll notice we actually had to haul Audrey's little table down to the kitchen for this project- because the clamp on my antiquated peeler wouldn't open far enough to clamp onto the thick edges of our granite counter tops, we had to rack our brains for something thinner and stable and this was our solution! 


Now what are we going to do with all the peeled/cored/sliced apples and the mound of tubular cores and ribbons of skin? Well, the apples, after a quick splash of lemon juice, are currently dehydrating on my counter, destined for something I've always wanted to try ever since reading the Little House books: dried apple pie! I mean how could you not want a slice after Laura's intensely nostalgic description of her Ma's?

And the 'waste' of all that apple processing- the cores and peels- are going to become apple scrap jelly. I made a batch last year around this time with rosy Fuji apples and it was delish. This year we're going with what we have: tart green Granny Smiths. Hoping it'll be a hit!

Oh how I love apple season!

Nom nom nom.